Task 4 – Puppet Build

Introduction

In this task I will be building my own puppet and explaining the process. Firstly, I researched puppets which Sophie taeuber created to use as a reference and to be inspired by her art. Below you can see the puppets which inspired me the most.


I like the hat and the makeup on this puppet model. 


I liked how this puppet looked more like a person and is wearing a dress.


Puppet Build

In this section you will see a sequence of images which shows how I have created my puppet.


1: Add sphere


2: Adjust sphere shape
Make the sphere look more like a head by slightly moving it to add a chin.


3: Cut head in half

4: Add mirror modifier
Add a mirror modifier along the X axis. We are doing this because a body and face is normally identical to its other half.


5: Extrude Neck
Extrude the neck down the Z axis.

6: Create torso
Create the torso by extruding the neck down to where the torso should end and then extrude and scale along on the X axis to create the width of the body.

8: Loop tool - Circle
Open up the special menu whilst still selecting the bottom of the thighs, in the special menu move to loop tool and choose circle. This changes the bottom of the thighs to a more circle shape than the default shape which is more of a hexagon.


9: Finish Legs
Extrude down the Z axis until you have your total leg length, Go back and add more detail by making some parts of the legs thicker than others. Once the legs are finished simply just extrude the bottom of it along the Y axis to create feet.


10: Create arms
Extrude the arms out, similar technique as the legs.

11: Final body model
This is the finished body for the puppet. 


12: Add a cylinder
This cylinder will be used to make the basic skirt shape.

13: Adjust cylinders shape
First, delete the top and bottom face and then scale out the bottom of the dress to create a shape which resembles a skirt.


14: Flatten models chest
To create the top I decided to flatten the models chest and then in edit mode I duplicated the chest and made the duplicated chest its own mesh by pressing CTRL P in edit mode. I found this technique easier to create the top rather than starting a new mesh.

15: Join the top and skirt together
In edit mode join up the top and the skirt so it looks like a dress. 

16: Position the chest & Materials the body
Put the dress on the puppet and scale it out untill it fits. I also added a wood material to my puppet.

17: Cut off top of the head & Materials the dress
First cut of the top half of the head to prepare making the puppets hat. Once done add a material to the dress. I choose a purple material which I later added more detail such as blue stripes.

18: Create Puppets hat
Extrude and scale the puppets hat. I decided to mode a hat which looks more like a graduation hat than a round helmet like in the reference image above. I added the same material which I used for the dress.

19: Add detail
I decided to add the 'horns' which the puppet in the reference image uses. I materialised the horns and the puppets shoes blue and added eyes and bright, almost clownish makeup to the puppets face.


Made changes

I have made several adjustments to my puppet for example I have changed the style of her dress by using the sculpting tool within blender. 


Task 1 - Schedule

Introduction

In this task I will be including a schedule which I have created. On the schedule I have put Put a ideal time which is the time I want to complete each task and I have also included the actual time which is the time which I actually completed the assignment. 

Chart

As you can see in the chart, I gave my self 14 days to complete the full assignment (2 weeks) As you can see, on the X axis you can see the amount of days. On the Y axis you can see the amount of tasks.  The blue line is the schedule I wanted to aim for whilst the red line is the actual schedule I achieved. 
On the first day I wanted to start and finish task one and on the second day I wanted to complete task two. On the third day I Wanted to have the third task finish but on day four when I I decided to choose to have 2 days to create the puppet because that is the most time consuming task whilst on day 6 I wanted to start task 5. On day 7 I gave my self another 2 days to finish task 6 and day 9 to complete 7. Day 10,11 and 12 I wanted to use for task 8 which is production and day 13 to complete task 9. Finally on day 14 I want to complete task 10 which is my final task. 

However the schedule didn't go to plan and I was behind a day until day 9 because it took me longer to finish the puppet rig than I expected it too. Although by day 11 I was back on track with my schedule and ended up finishing the assignment a day earlier than i expected to which is good because it allowed me to tweak each task.

Task 3 – 3D Gameplay Animation Research

Introduction

Animation is in every modern game even if it is as simple as a walking cycle; every game has some sort of animation. In this task I will be describing the different animations which you see in modern games and how they are created.


Game Play Animation Research

Animations require skill, creativity and a lot of time. There are a lot of different techniques on how you can create an animation. Today animation is usually created on computer software which can create almost everything including your animations environment, characters and more. Before this technique was used, animation used to be created by using several of different photographs or drawing sequences. Although this technique is not usually used anymore, animations in games and films usually use computers to create digital animations and then use a wide-range of techniques to either make 2D or 3D animations. 

2D animations are a traditional animation method which has been existed since the 1800s, this technique is usually creating a sequence of images and each image is slightly different so when the sequence of images is combined it created an animation.  When creating 2D animation you can use programs such as adobe Photoshop or anime studio debut to create ‘flat’ images. 
Whilst 3D animation is a animation that needs a  3D software programme to create 3D images which usually have a lot more depth and makes the animation look a lot more relativistic because you can add lighting, shadows, physics etc which is difficult to do within a 2D animation.  3D animation is manipulating three dimensional objects by creating a 3D mesh in programs such as Blender, Unity and Light wave. These programs usually have a lot of features which allows the artist to create anything they want to model.

Animations in films are a lot different than the ones in games. When creating animation for a film you only need to include what the camera is able to see because the user isn’t able to turn the camera around the film unlike they can with a game. This means that when creating animation for a film they can almost ‘cheat’ and just create animation where the person can only see it which is a lot less time consuming than creating animation for a game. Games are interactive which means the player is able to control the game there self so if they wanted to move the camera and look around the environment they can. This means that the animation needs to look good from almost every angle, unlike in films where the animation is only focused in the camera view.  

The animation within the game needs to look good from any sort of angle so usually an animation within a game is built up of different types of cycles. For example the player could have a walking cycle but will also need a breathing cycle or a standing cycle.If you are playing a shooting game then there will be animation whenever you character even does the simplest action such as aiming a gun, reloading a gun, crawling, crouching.  
Each of these animations need to be perfect in every angle as possible, even the amount of time a animation takes needs to be considered. For example if you are reloading your gun you don’t want a animation which will take 10-15 minutes because it will take your character 10-15 to reload their gun which will frustrate players. Animation need to be as quick as possible but still ensure that the animation is benefiting the game.

Below I am going to include the different animation cycles which are used within 2D and 3D animation such as walking, running, jumping. I am also going to include videos of popular games which use these cycles. At the bottom of the page there will be a list of the references I have used.


3D Animation


Walk cycle
This animation is a 3D human walk Cycle created in Maya


Run Cycle
A fast run cycle created in Maya.


Reload Animation
Animation showing 3D character reloading a pistol.


Jump Animation

3D Games

Titanfall 2


Resident Evil 7

2D Animation


Walk Cycle

Run Cycle

Reload Animation

Jump animation

2D Games


Rive

Inside


Sources

Websites
https://www.pluralsight.com/blog/film-games/how-animation-for-games-is-different-from-animation-for-movies
https://www.gamedesigning.org/animation/different-types/

Images/videos

https://www.youtube.com/watch?v=f-Zw2k7p9vc
https://www.youtube.com/watch?v=rRjUPIzV9Ww
https://www.youtube.com/watch?v=3pY1aVk4tBI
https://www.youtube.com/watch?v=rn_zWGYeDUA
https://www.youtube.com/watch?v=SCenq-HHDMc
https://www.youtube.com/watch?v=mRbeU3cFyUY
https://www.youtube.com/watch?v=fqIMNyxyUMg
https://www.youtube.com/watch?v=zm_dNon43sY
https://www.youtube.com/watch?v=ybaqCcMxTp0
https://www.youtube.com/watch?v=RTyaJbTrdBU
https://www.youtube.com/watch?v=mwwoaS0PSTA
https://www.youtube.com/watch?v=vPcolQbesz4

Task 2 – Dada and Sophie Taeuber-Arp Research

Introduction

In this task I will be explaining the Dada movement and sophie arp by using both written and visual research. At the bottom of this task you can see all of the sources which I have used for my research.The reason I am researching the dada movement is because eventually I will be using this research to help inspire me when I am creating my own dada puppet. 


Dada movement

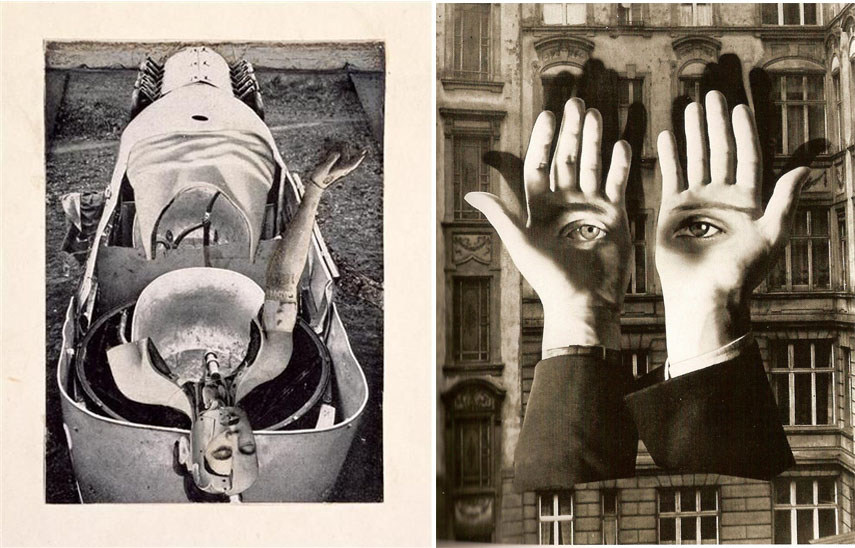
Dadaism is an art movement that was formed and arose during the First World War in Zurich, Switzerland. The Dada movement is consisted of artists who had a negative reaction to the war and rejected the logic, reason and the aestheticism of modern capitalist society as well as being influenced by other avant-garde movements such as cubism, futurism and expressionism. 


Dada was the first conceptual art movement where the artist was not crafting aesthetically pleasing objects but instead was using everyday objects that could be bought to present art with little manipulation by the artist. This means that the artist wasn’t focusing on the art being beautiful but wanted the art to express a deeper meaning. The artist widely expressed his art by using poetry, photography, sculpture, painting and colleges to help provide a more power influence to other artists in other cities. The art produced is often satirical and nonsensical in nature as dada was anti-war and created his art to establish surrealism and modern society problems such as world war one.  In fact the artist HansArp wrote a letter expressing that even though guns were shooting in the background the art never stopped. 


"Dada became an international movement and eventually formed the basis of surrealism in Paris after the war.
Revolted by the butchery of the 1914 World War, we in Zurich devoted us to the arts. While the guns rumbled in the distance, we sang, painted, made collages and wrote poems with all our might."

Dada artist appealed that the mockery of materialistic and nationalistic attitudes is a powerful enough tool which will influence groups all over the world and aimed to change the traditional value in art to a new art and replace the old. Overall the Dada movement influenced many cities including Berlin, Hanover, Paris, New York, and Cologne.  Dada Art was usually described as ‘Anti-Art’ which is a term that is used to describe art which challenge the existing accepted definitions of art and basically question art in general. 


 Since Dada there has been many different art movements which have also been described as ‘anti-art’ some of which have embraced the absurdities of dada. Dada art represented the opposite of everything art at the time stood for – it was not beautiful like the rest of the art but had a strong meaning  Although groups in Germany did not like anti-art as much as the other groups. The art in Germany included more propaganda and political activities and the war-torn environment of Berlin dramatically impacted the ideas of Dadaists within Berlin.
The reason why the dada movement became so popular within other cities was because for many people the dada movement was a protest against the nationalists and the colonialist’s interests which many Dadaists believed caused the war. Therefore they expressed their rejection by using ‘ready made’ art to express the chaos and irrationality of the First World War. For example one of the dada artists George grosz explained how his art was intended as a protest “against this world of mutual disruption”.


The origin of dada is unclear and some believe that it is a nonsensical word which means it has little meaning although there are many theories on what dada means. For example, Dada means “yes, yes” in Romanian language whilst others believe that the reason why it is called dada movement is because the artist had a meeting as a group when a paper knife stuck into the French-German dictionary which happened to be pointing at the word Dada. 

Other theories think it is because it is the Child's first word so using the word Dada explains the childishness and the absurdity which appealed to the Dada group.

 I personally think the word Dada has no meaning at all in any language and the group liked how the word meant nothing in all languages but the most common theory is that Richard Huelsenbeck found the name by stabbing a dictionary with a knife. Richard Huelsenbeck was born in 1892 and by early 1917 when he was in Berlin he introduced Dada ideas and became the organiser, promoter and historian of Dada. 

In fact All of the artistic principle and devices in our day and age such as literature, music, theatre and virtual arts were either promoted (if not created) by the dadaist.  By 1917 they even released a Dada magazine which was published and held in art exhibits to help spread the message of anti-war. Even in 1918 when the First World War ended many of the dadaist artists went home and still carried on spreading the Dada message. 


Sources

Websites
http://www.theartstory.org/movement-dada.htm
http://www.tate.org.uk/art/art-terms/d/dada
http://www.tate.org.uk/art/art-terms/a/anti-art

Images
http://www.widewalls.ch/dadaist-artists-dada/
 https://prezi.com/s3tk_5plci7q/dadaism/
http://artcocktail.mallforarts.com/2014/10/dadaism-socially-active-art-movement/
http://www.emptykingdom.com/featured/ek-interview-irina-and-silviu/
http://d2jv9003bew7ag.cloudfront.net/uploads/Left-Max-Ernst-Anatomie-als-Braut-Anatomie-jeune-marie%CC%81e-1921-Right-Herbert-Bayer-Lonesome-City-Dweller.jpg
https://seanborg1991.wordpress.com/2013/11/23/dada/


Sophie Taeuber 

Sophie taeuber-arp was born in Davos, Switzerland in January 1889  although when her father died when she was only aged 2, her family moved to trogen which where she studied textile design at gewerbeschule for four years (1906 - 1910)  She then did a extra year at Kunstgewerbeschule which is a arts and crafts school in Hamburg.  
In the year 1915 she met Jean “Hans” Arp at a exhibition called the tanner gallery. Jean Hans arp had previously moved to Zurich in 1915 to avoid the German army during the First World War.  In 1922 they both got married and she changed her last name to ‘taeuber-arp’ Jean Arp who is also known as Hans Arp was born September 1886 and he was a german-french sculptor, painter, poet and abstract artist. They both did collaborate art on a numerous of joint projects until Sophie died in 1942. 

Throughout her life she was a Swiss artist, painter, sculptor, textile designer, furniture and interior designer, architect and dancer.  She got involved in the Zurich dada movement and in 1920, 2 years before jean and Sophie got married, she met and solicited with over four dozen Dadaist artists which were Taeuber-Arp, Jean Arp, Jean Cocteau, Marcel DuChamp, and Hannah Hoch. 
They originally planed to use text and images to create a dada work called the dadaglobe although the project was abandoned when its main backer distanced himself. 
She became the key figure to many of the important movements of the pre-world war 2 art scene in Europe taking part in the in Dada-inspired performances as a dancer, choreographer, and puppeteer, and she designed puppets, costumes and sets for performances at the Cabaret Voltaire as well as for other Swiss and French theatres. She also made a number of sculptural works, such as a set of abstract "Dada Heads" made out of polychromed wood. 

Even though she is considered one of the most important artists of art and geometric abstraction of the 20th century, it took a lot longer for her reputation to be seen by the public simply because her husband became famous. Her work only became recognisable after the Second World War. She was dedicated to the ideas of dada throughout her whole career and she tried her best to apply dada to everything in a wide range of forms, she even explored the different relationship between fine art and performance and even brought dada and its abstraction to dance and puppetry.  
Many museums around the world have her work in their collections and her work is now generally accepted as the first rank of classical modernism which is part of the philosophical movement. 


Sophie Taeuber puppets were normally painted in bright colors to present a frontal view and everyday objects. Her puppets look quite simple and she used basic elements to create her puppets. For instance in the image below you can see one of her puppets, it has a turned wooden pear shaped head which was common in her designs. You can see how she has used basic elements such as ovals to create the legs and arms, it doesn't look to difficult to create. When I am creating my puppet I want it mainly to be inspired by the puppet below, I like her dress and her hair. 


Sources

Website

Images


Task 5 – Post Production & Conclusion

After creating the basic puppet animation such as walking and running, I decided to create a short sci-fi animation to test my skills. I found this animation very time consuming to create, some of the models were tricky and had a lot of detail in which i was able to reduce by only putting detail within the models where the camera would see them to reduce time and reduce the number of polgons within my model. However rendering the animation took a few days due to splitting the animation into separate scenes and rendering each scene instead of the whole animation as one. 


The reason I decided to create several scenes was because I thought it would benefit the camera angles and it did make key-framing the animation alot simpler although each scene roughly has 100-300 frames and rendering the frames was very time consuming. 
I rendered my animation as PNGs because After researching the best and proper way to render a animation using blender,the experts advised formatting the animation as PNG's so the animation will be saved as 300 pictures instead of a one video format. The reason the experts advised using this format was simply because rendering your animation in PNGS overall is a lot more beneficial than rendering it straight as a video because sometimes it can take just as long to render the animation as a video than as a png and there is a possibility that the video format can get encrypted which means there is a high possibility that you could render your animation as a video and it failing and just not working. But because you are rendering the animation as PNGS, each frame is saved as a image so if something goes wrong you can go back to that frame and carry on as normal. Rendering your animation as a png also allows you to render a much higher quality in much shorter time than if you was going to do it as a video. 

Once I finished all my scenes and rendered each scene as a PNG, i used the video editor within blender to make the animation. I placed the PNGS within the editor and added my audio then I finally rendered the whole thing in the Format H.264 which took less than 3 minutes to render the whole animation because we have already rendered the animation previously as PNGS.


I am overall satisfied with my final animation and I am happy with my final 3D models and how well I used blender to its full capacity for example I explored different blender plugins and used them too my full advantage. Although there is some changes which I would change if i was to create the animation again, for instance I would put a bit more detail within the animation and do a better walk cycle. I believe my animation has met the assignment brief standards although there is room for improvement animation wise. 


Audio Used - disclaimer 
The audio used within my animation is not created by my self therfore I am listing the sites to the audio I have used;


Websites used for voice audio